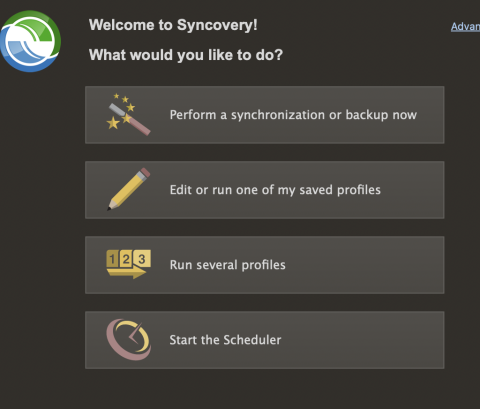
To configure your Google@SAS account in Syncovery to transfer your data to another cloud storage service or to local storage you will want to first install the trial version of Syncovery found here. Once installed, launch the app and then select Perform a sychronization or back up now
On the following screen you will be asked to supply the Left-Hand and Right-Hand sources for the data transfer:
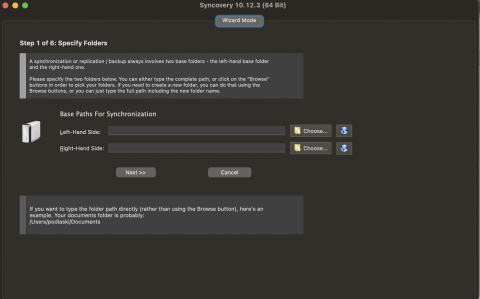
Select the Globe button on the Left-Hand side to confgure your Google@SAS account. Under Protocol select Google Drive, add your SAS email address as the account and then select Choose next to Container:

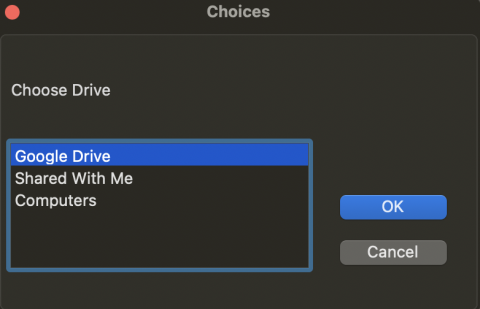
This will then take you to your system browser to log into your Google@SAS account and select Allow to allow Syncovery access to move your files to another location. Once allowed the page will let you know it can be closed and to return to the Syncovery app. You will now be prompt to select the source from within your account, select Google Drive and click OK:
You will then be brought back to the main menu to select the Right-Hand destination for the transfer. You can choose to transfer to another cloud storage service by selecting the Globe button or to a local drive connected to your machine by selecting Choose:

Once you have selected your destination, click Next and follow the prompts in the app to begin the transfer. Transfer times can vary depending on the amount of data being moved.