Recording lectures in the classroom can now be done through the Zoom-Canvas integration. The Zoom-Canvas integration is a great way to ensure that recorded lectures are stored properly and that students are able to easily access them. Below you will find a step-by-step guide for setting up your Zoom meetings on your Canvas site. In addition to reviewing this guide, we strongly recommend that you reach out to your LSP (Local Support Provider) to request a practice session in your classroom so that you can see how the technology in the room will work for recording lectures.
Here is the list of the LSP's and their contact info: SAS LSP Contact Info by Department
The audio and video devices in the room are connected to the classroom PC. You will need to use the classroom computer for presenting and recording.
- If there is a camera in the room it will be automatically selected as your video input, but these cameras are meant to capture an image of the instructor and are not meant to capture writing on chalkboards or whiteboards.
- For rooms without a camera, only sound and the screen share can be recorded. Note: you can still use your laptop and it's built in camera and mic to record your lectures using this guide.
- In either case, please refer to our documentation about digital whiteboarding and use one of those tools instead of writing on chalkboards or whiteboards if you want the material to be captured.
In preparation, ensure that both Zoom and Class Recordings are listed on the Canvas site. If they are not, they can be added by going to the Canvas site’s Settings page and clicking on Navigation tab at the top menu. After adding them please sure to click the blue Save icon at the bottom of the page to ensure your changes are saved.
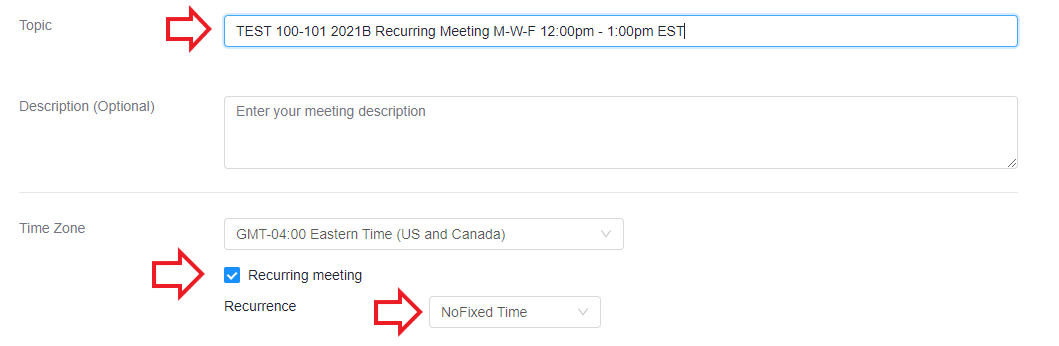
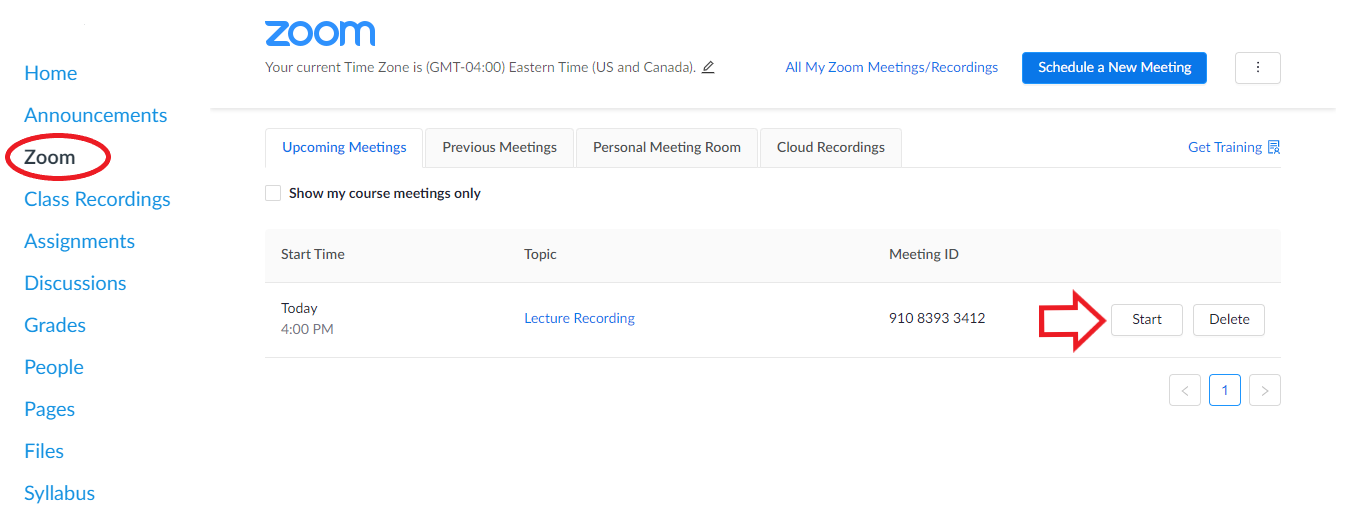
On the Zoom page of the Canvas course site, click on Schedule a New Meeting. Here you can schedule meetings for dates and times you intend to record your lectures in class. If you intend to record recurring lectures you can schedule recurring meetings.

For a recording that happens every week, set up a “Recurring Meeting” with Recurrence set as "No Fixed Time"“ and specify the dates and times in the meeting description or title. Setting up the Zoom meeting this way will create one easy to find link instead of multiple listings for the same meeting ID.
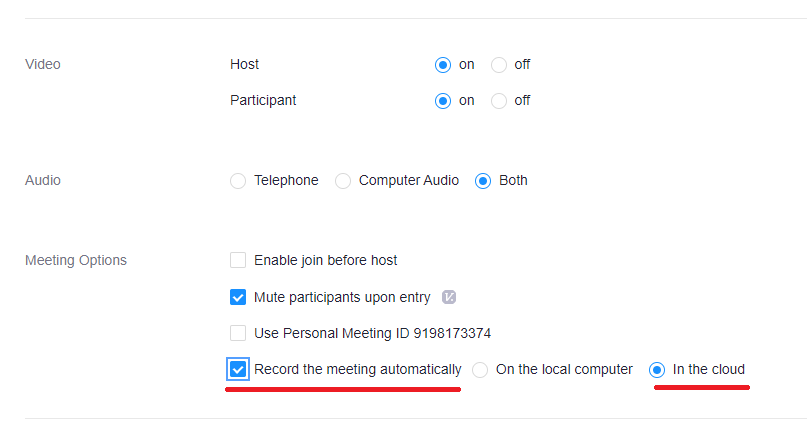
While scheduling the meeting it is recommended to check the boxes "Record the Meeting Automatically" and "In the Cloud". It's important to select these setting in order to have the recordings automatically upload into the Class Recordings page.
For a more in-depth guide on how to schedule meetings within the Zoom Canvas integration please visit - https://infocanvas.upenn.edu/tools/zoom-for-instructors
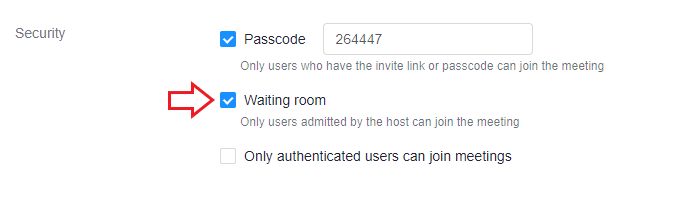
To ensure that there are no accidental or unwanted attendees in the meeting during the time of recording, enable the Waiting Room feature. With this enabled, no one can join the meeting unless you manually let them in.
Double check your settings and you are ready to Save your meeting. After saving the meeting it will take you to a screen that overviews the meetings settings.
While in the classroom, and logged into the classroom PC, Start the meeting from the Zoom page on the Canvas course site.
If there is a camera in the room it will be automatically selected as your video input. For rooms without a camera, only sound and the screen share can be recorded.
Zoom can record the camera and the computer screen/PowerPoint presentation at the same time. To do this you will need to click on the Share Screen button at the bottom middle of your Zoom window and select the screen or program you wish to record. If you intend to show a video with sound or an audio clip, be sure to check the Share Sound option on the Share Screen pop up window.
For a more in-depth guide on screen sharing please visit: https://support.zoom.us/hc/en-us/articles/201362153-Sharing-your-screen-content-or-second-camera
This part of the guide covers what to do when there is a microphone in the classroom that that feeds its audio into the classroom PC to facilitate lecture recording.
Some classrooms have multiple microphones, and in these cases we recommend that you use the wireless lav mic for your recordings and mute all other mic sources (which can include the podium mic) in the room using the touch screen. Put the wireless lav transmitter (bodypack) on your belt using the belt clip or in your pocket. Attach the mic, using the clip, about 6 inches away from your mouth in the center of your chest if possible. The bodypack/transmitter for the wireless lav mic has an LED indicator on top that will turn red to indicate power before turning green to indicate it has paired with the receiver. This takes approximately 10 seconds to complete and will occur automatically when the bodypack is removed from the charger. If it does not, press the red power button on the side to power it on.
Many classrooms now include a ceiling microphone which captures audio from the entire room and feeds it into Zoom. The ceiling microphone allows for hybrid style teaching/conferncing as anyone speaking in the classroom will be heard clearly over Zoom. If the room has both a ceiling microphone and a wireless lav mic, consider whether or not you want the entire room to be heard (use the ceiling mic) or only the presenter (use the wireless lav mic).
Some larger classrooms and auditoriums will have mics that simultaneously feed into the Zoom recording and come out of the classroom speakers for voice reinforcement. Smaller classrooms that have mics may not have voice reinforcement due to their size.
**Please note that for rooms with "voice reinforcement" you may experience a slight echo if the volume for the speakers is turned up too high. Try to do a test recording to determine the best volume for your use case.**
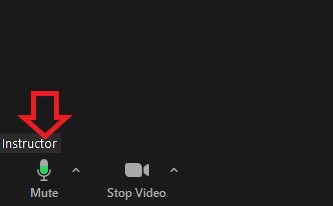
You can verify the mic is on by watching the mic icon in Zoom fill up with green when you speak.
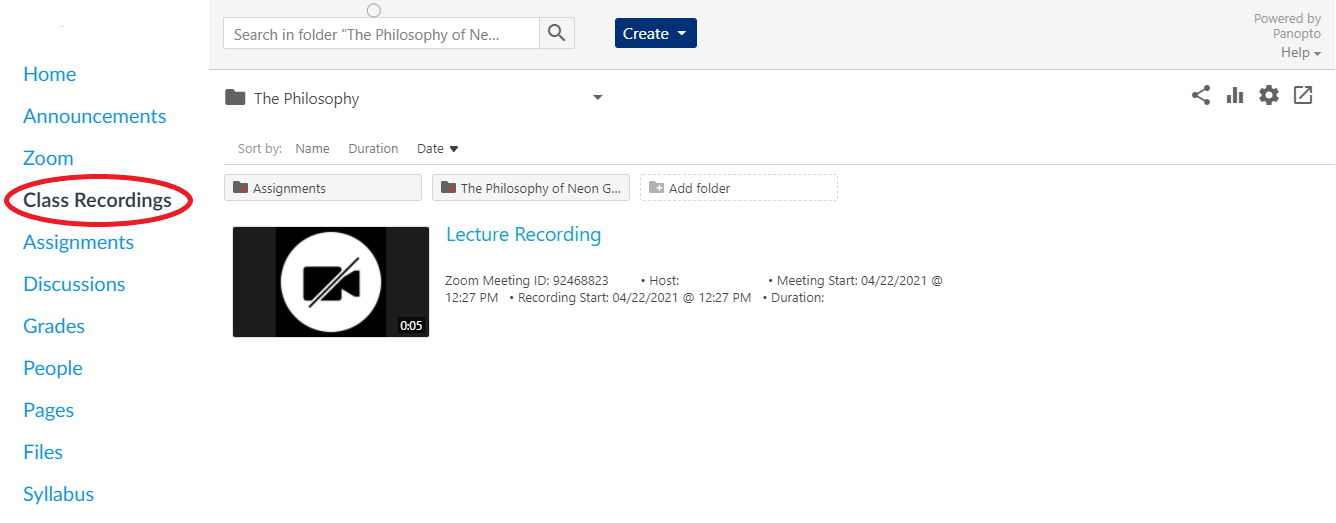
Once your lecture is complete you can press the Stop Recording button or end the Zoom meeting. The recording will then upload automatically into your Class Recordings page on your Canvas site. Please note that the longer the recording the longer it will take for the video to upload and process.
For further assistance please reach out to instructional-support@sas.upenn.edu or your LSP.